These are my notes (mostly for myself!) on getting SSH authentication through GPG under a variety of Windows 10 environments like native SSH (see c:\windows\system32\openssh\*), Windows Subsystem for Linux (WSL) and minGW / GIT Bash. Why? So you have a single, GPG based identity on a secure, removable hardware key store like a OpenPGP card (e.g. Yubikey 5) and your SSH keys are based off that GPG identity. No naked RSA SSH keys floating around on disk.
This document does NOT cover generating the GPG keys or moving the GPG profile and keys to the Yubikey. If you want that, see this.
NOTE: Everywhere here, replace
– Captain Obvioussidwith your username as appropriate e.g.c:\Users\sidbecomesc:\Users\<yourusername>
Overall idea
The core idea is to install and setup gpg natively on Windows 10. We use gpg-agent to perform SSH authentication via the pageant protocol. So we’ll be building bridges (via sockets and named pipes) to make those cross-environment connections. The complexity comes from the fact that the ends of those bridges (sockets and named pipes) are incompatible, the openssh(=non-pageant) ssh authentication protocol is unreliable and there are multiple SSH installations in most cases.
Windows 10 setup
I actually already had gpg4win but it simply wouldn’t prompt me for the GPG PIN i.e. authentication failed no matter what I tried. After struggling for a day with this, I uninstalled it completely and started fresh. In addition to having your private key on the YubiKey, it is highly recommended you have an air-gapped or offline backup of your public and private keys.
- [Optional] Uninstall gpg4win and then delete the
c:\Users\sid\.gnupg\andC:\Users\sid\AppData\Roaming\gnupg\folders. - Install gpg4win (download)
- Re-import your GPG public key and private key into GPG per this guide. The actual private key stays on the OpenPGP card, just a link to it is imported into GPG.
- Edit
%APPDATA%\gnupg\gpg-agent.confto haveenable-putty-support - Download WSL-SSH-Pageant and install it somewhere e.g.
C:\tools\wsl-ssh-pageant - Start the bridge on the Windows side by
C:\tools\wsl-ssh-pageant\wsl-ssh-pageant-amd64-gui.exe -systray -verbose -wsl C:\tools\wsl-ssh-pageant\wsl-ssh-agent.sock - Start Windows’ GPG agent by the following powershell command
& "C:\Program Files (x86)\GnuPG\bin\gpg-connect-agent.exe" /bye
Automating it
To start the above bridge automatically at startup, do this:
- Open
C:\Users\sid\AppData\Roaming\Microsoft\Windows\Start Menu\Programs\Startup - Put one shortcut that runs
"C:\Program Files (x86)\GnuPG\bin\gpg-connect-agent.exe" /bye - Put another shortcut that runs
"C:\tools\wsl-ssh-pageant\start wsl-ssh-pageant.bat" - create a file
C:\tools\wsl-ssh-pageant\start wsl-ssh-pageant.batwhich has the following. This ensures that a permanent terminal window isn’t kept dangling
pwsh -WindowStyle Hidden -Command Start-Process -NoNewWindow 'C:\tools\wsl-ssh-pageant\wsl-ssh-pageant-amd64-gui.exe' '-force -systray -verbose -wsl C:\tools\wsl-ssh-pageant\wsl-ssh-agent.sock -winssh winssh-pageant'If you don’t have the newer cross platform PowerShell (pwsh) used in the above command, install it from here (preferred) or use the older powershell.exe.
SSH auth in WSL
This routes WSL’s SSH authentication across to GPG’s SSH agent using the bridge we setup earlier
- Issue this command in a WSL terminal
export SSH_AUTH_SOCK=/mnt/c/tools/wsl-ssh-pageant/wsl-ssh-agent.sock - test with something like
ssh sid@lab-linux13-ubuntu18. You should see a GUI PIN prompt on the Windows 10 side
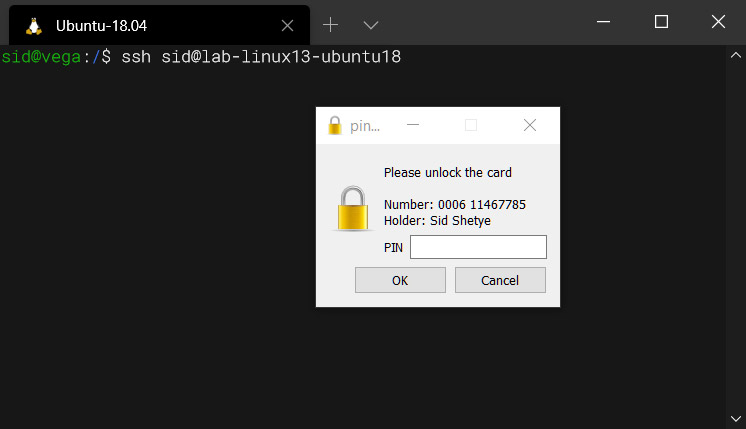
Automating it
Open a WSL terminal, edit ~/.profile file to add
# Connect WSL SSH auth to Win SSH side
export SSH_AUTH_SOCK=/mnt/c/tools/wsl-ssh-pageant/wsl-ssh-agent.sock
SSH auth in Windows 10
Windows 10 now ships with a native OpenSSH client that lives in c:\windows\system32\openssh. If you just want to open a command prompt or powershell window and ssh away, this is for you.
- Run
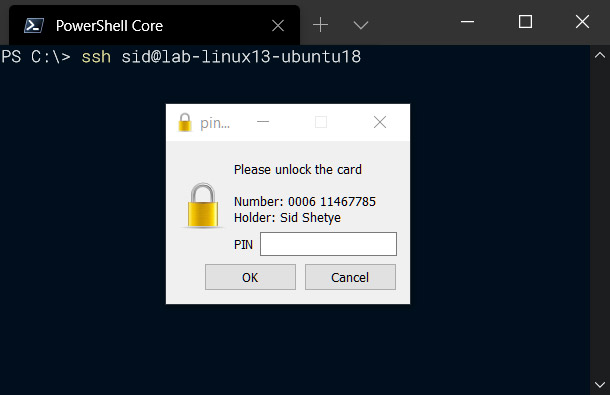
$env:SSH_AUTH_SOCK="\\.\pipe\winssh-pageant"in powershell - test with something like
ssh sid@lab-linux13-ubuntu18. You should see a GUI PIN prompt on the Windows 10 side
Make GIT use SSH + GPG
Chances are you also want to be able to issue a git command in a regular windows terminal for your work e.g. git fetch. The issue is there are two SSHs even in the pure native Windows 10 side. One in c:\windows\system32\openssh\ and the other installed by GIT at C:\Program Files\Git\usr\bin – and GIT will use it’s version and not the version we just setup above.
To fix that, open a Windows Powershell terminal and type $env:GIT_SSH="C:\Windows\system32\OpenSSH\ssh.exe" and then test it works by issuing git fetch from a suitable git repository (make sure the GIT repo has your corresponding SSH key registered). If all works, you should see the PIN prompt.
Automating it
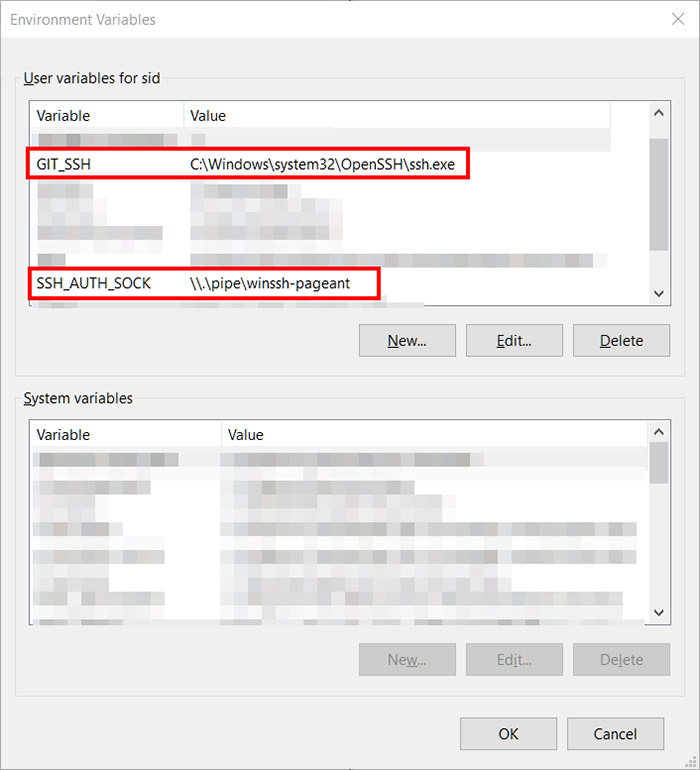
- Windows 10 Start Button -> type
environment variables-> Edit environment variables for your account -> User variables for sid -> New - Name =
SSH_AUTH_SOCKand value =\\.\pipe\winssh-pageant-> Ok - Repeat with Name =
GIT_SSHand value =C:\Windows\system32\OpenSSH\ssh.exe-> Ok
SSH auth in Git-Bash (mingw)
When you install git for windows, you get a bash shell that’s based off “Minimalist GNU for Windows” – a minimalist development environment for Windows. GIT runs within that.
- Run
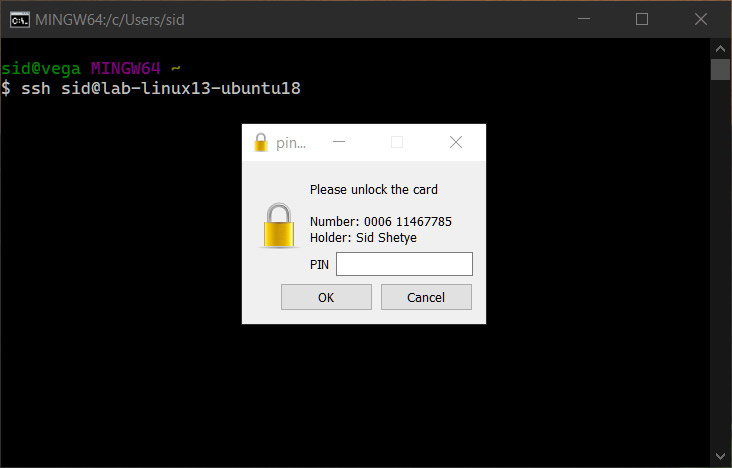
eval $(/usr/bin/ssh-pageant -r -a "/tmp/.ssh-pageant-$USERNAME") - test with something like
ssh sid@lab-linux13-ubuntu18. You should see a GUI PIN prompt on the Windows 10 side
If you’re using SourceTree, switch to putty SSH authentication and
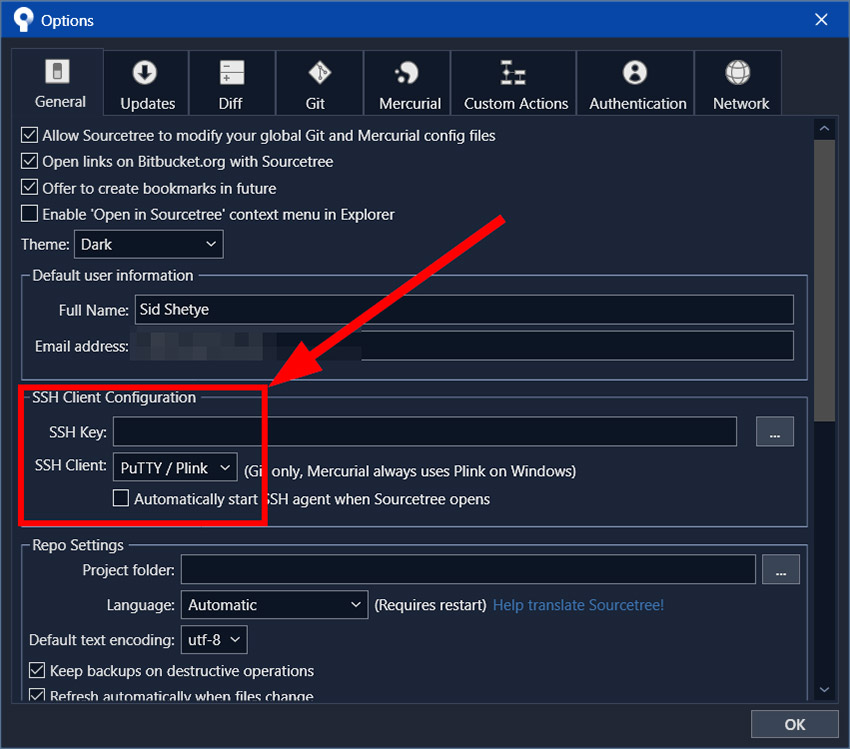
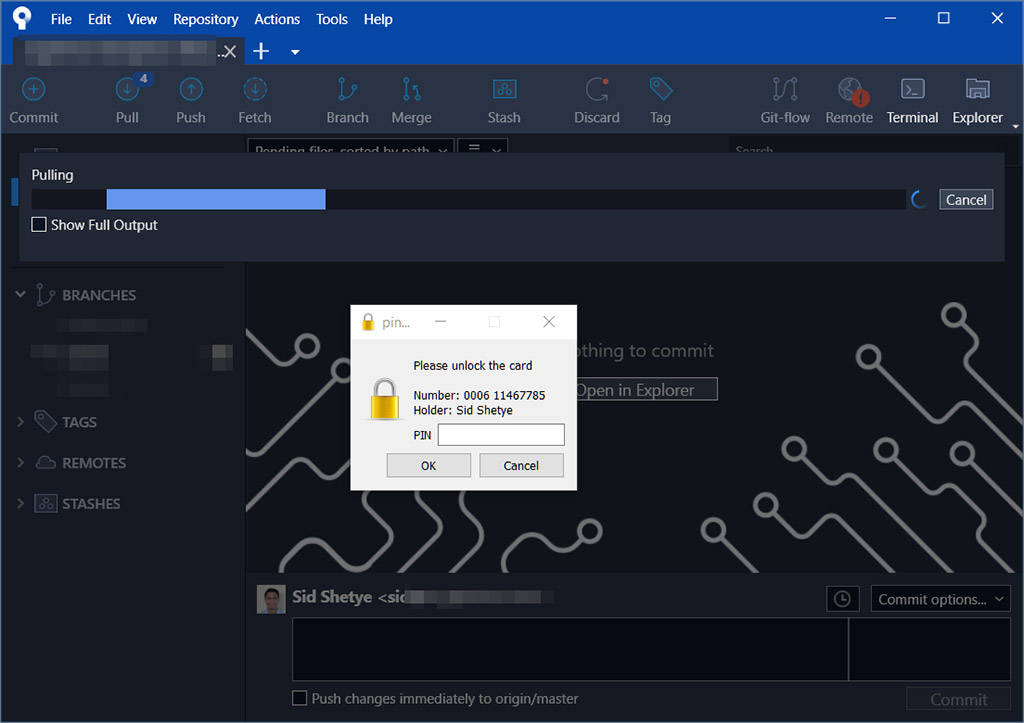
Automating it
Just add the following to your git-bash’s ~/.bashrc or .profile file
eval $(/usr/bin/ssh-pageant -r -a "/tmp/.ssh-pageant-$USERNAME")WSL setup for running GPG
If all you care is SSH on WSL using gpg-agent on Windows, then the SSH auth bridge setup above is all you need. You do not need this additional bridge. But if you want to use the gpg binary within WSL (e.g. encrypting files), then you need another bridge to handle the gpg communications into the Windows world.
- Download
npiperelay(link) with GPG support and unzip it to something likec:\tool\npiperelay\npiperelay.exe - install socat by
sudo apt install socat - in WSL run (it’s all one line)
socat UNIX-LISTEN:"$HOME/.gnupg/S.gpg-agent,fork" EXEC:'/mnt/c/tools/npiperelay/npiperelay.exe -ei -ep -s -a "C:/Users/sid/AppData/Roaming/gnupg/S.gpg-agent"',nofork - Test by running
gpg --card-statusin WSL, it should work
Automating it
Add the following to the end of your WSL’s ~/.profile file
# this connects WSL gpg to windows GPG
GPG_SOCK=${HOME}/.gnupg/S.gpg-agent
if [ ! -e "$GPG_SOCK" ]; then
    echo "Starting socat on $GPG_SOCK ..."
    socat UNIX-LISTEN:"$GPG_SOCK,fork" EXEC:"/mnt/c/tools/npiperelay/npiperelay.exe -ep -ei -s -a 'C:/Users/sid/AppData/Roaming/gnupg/S.gpg-agent'",nofork &
fi
Ending comments – Yubico and the state of the ecosystem
Overall, I’m rather disappointed with the quality of software and how they all (don’t) interoperate smoothly. I also contacted Yubico to see if they had any internal documentation since external documentation about this was sparse. Astonishingly their just sent back unrelated links to 3rd party blog posts. If git for Windows, OpenSSH, and GPG don’t work well out of the box, Yubico should be stepping up and providing guidance to smooth that journey since they’re selling security devices that are heavily dependent on that ecosystem.
Troubleshooting
Windows 10’s default OpenSSH authentication agent was disabled but it is unclear if this is a necessary requirement.
Start button-> Services -> OpenSSH Authentication Agent -> Stop
Great post! I was able to get everything working initially but I am getting errors with Powershell saying: Error connecting to agent: Permission denied (when running normal session) and error fetching identities: agent refused operation (when running in admin session).
WSL is saying Could not open a connection to your authentication agent.
The wsl-ssh agent also closes intermittently.
Any troubleshooting tips? I have tried a fresh gpg4win install and deleted/rerun everything twice now.
Not sure what could be wrong. Maybe a conflict between the GPG SSH agent and the OpenSSH SSH agent? Newer Windows 10 installs it’s own “OpenSSH Authentication Agent”. Check with start -> services -> double click “OpenSSH Authentication Agent” -> “Startup type” should be “Disabled”. Remember that if you upgrade Windows 10, you have to repeat this disabling step. If this works, let me know and I can add to the main article.
Thanks for the Reply!
I had to restart the system and reinsert the key.
Hi,
thanks for the great write-up.
Actually it does not fully work for me. ssh-add -l lists my key after setup but if I try to connect to the server it does not work, I get no pinentry. (I see the server offering the same key ID I see listed though.) Any idea for me where to look? Thank you for any help. cheers
Have you tried getting this to work with ECDSA? It seems it should be theoretically possible, but the hurdles might be a bit too high yet on Windows.
Please note that Gpg4Win has changed the socket folder location from %LOCALAPPDATA%/gnupg to %APPDATA%/gnupg
This means that instead of AppData/Roaming/gnupg you need to use AppData/Local/gnupg
This small change cost me more days than I care to admit. Hopefully this note helps at least one person out there… 🙂